
How to Clean a Sig Sauer P365
I've always seen cleaning my gun after a day at the range as a thing to look forward to. Something about stripping your firearm and laying bare the mechanics is thoroughly enjoyable. In this article, we're going to lay out how to clean your Sig Sauer P365.
The seven steps to cleaning your P365 are:
- Safely clear the chamber
- Disassemble your firearm
- Clean the slide assembly
- Clean the barrel
- Clean the recoil spring assembly
- Clean the frame assembly
- Reassemble
Of course, each of those steps require a little bit of work and each has its own nuance. We'll get into all these details and more below.
Introduction
Regular maintenance of your firearm is crucial for both safety and reliability. A clean firearm not only functions better but also lasts longer. This guide will walk you through the step-by-step process of cleaning your Sig Sauer P365, ensuring it remains in peak condition for years to come.
Safety First: Always treat every firearm as if it were loaded. Double-check that your firearm is unloaded before beginning any cleaning procedure.
Required Materials
While there are several different tools you can use to achieve the same result, here are the materials we'll be using in this guide:
- CLP
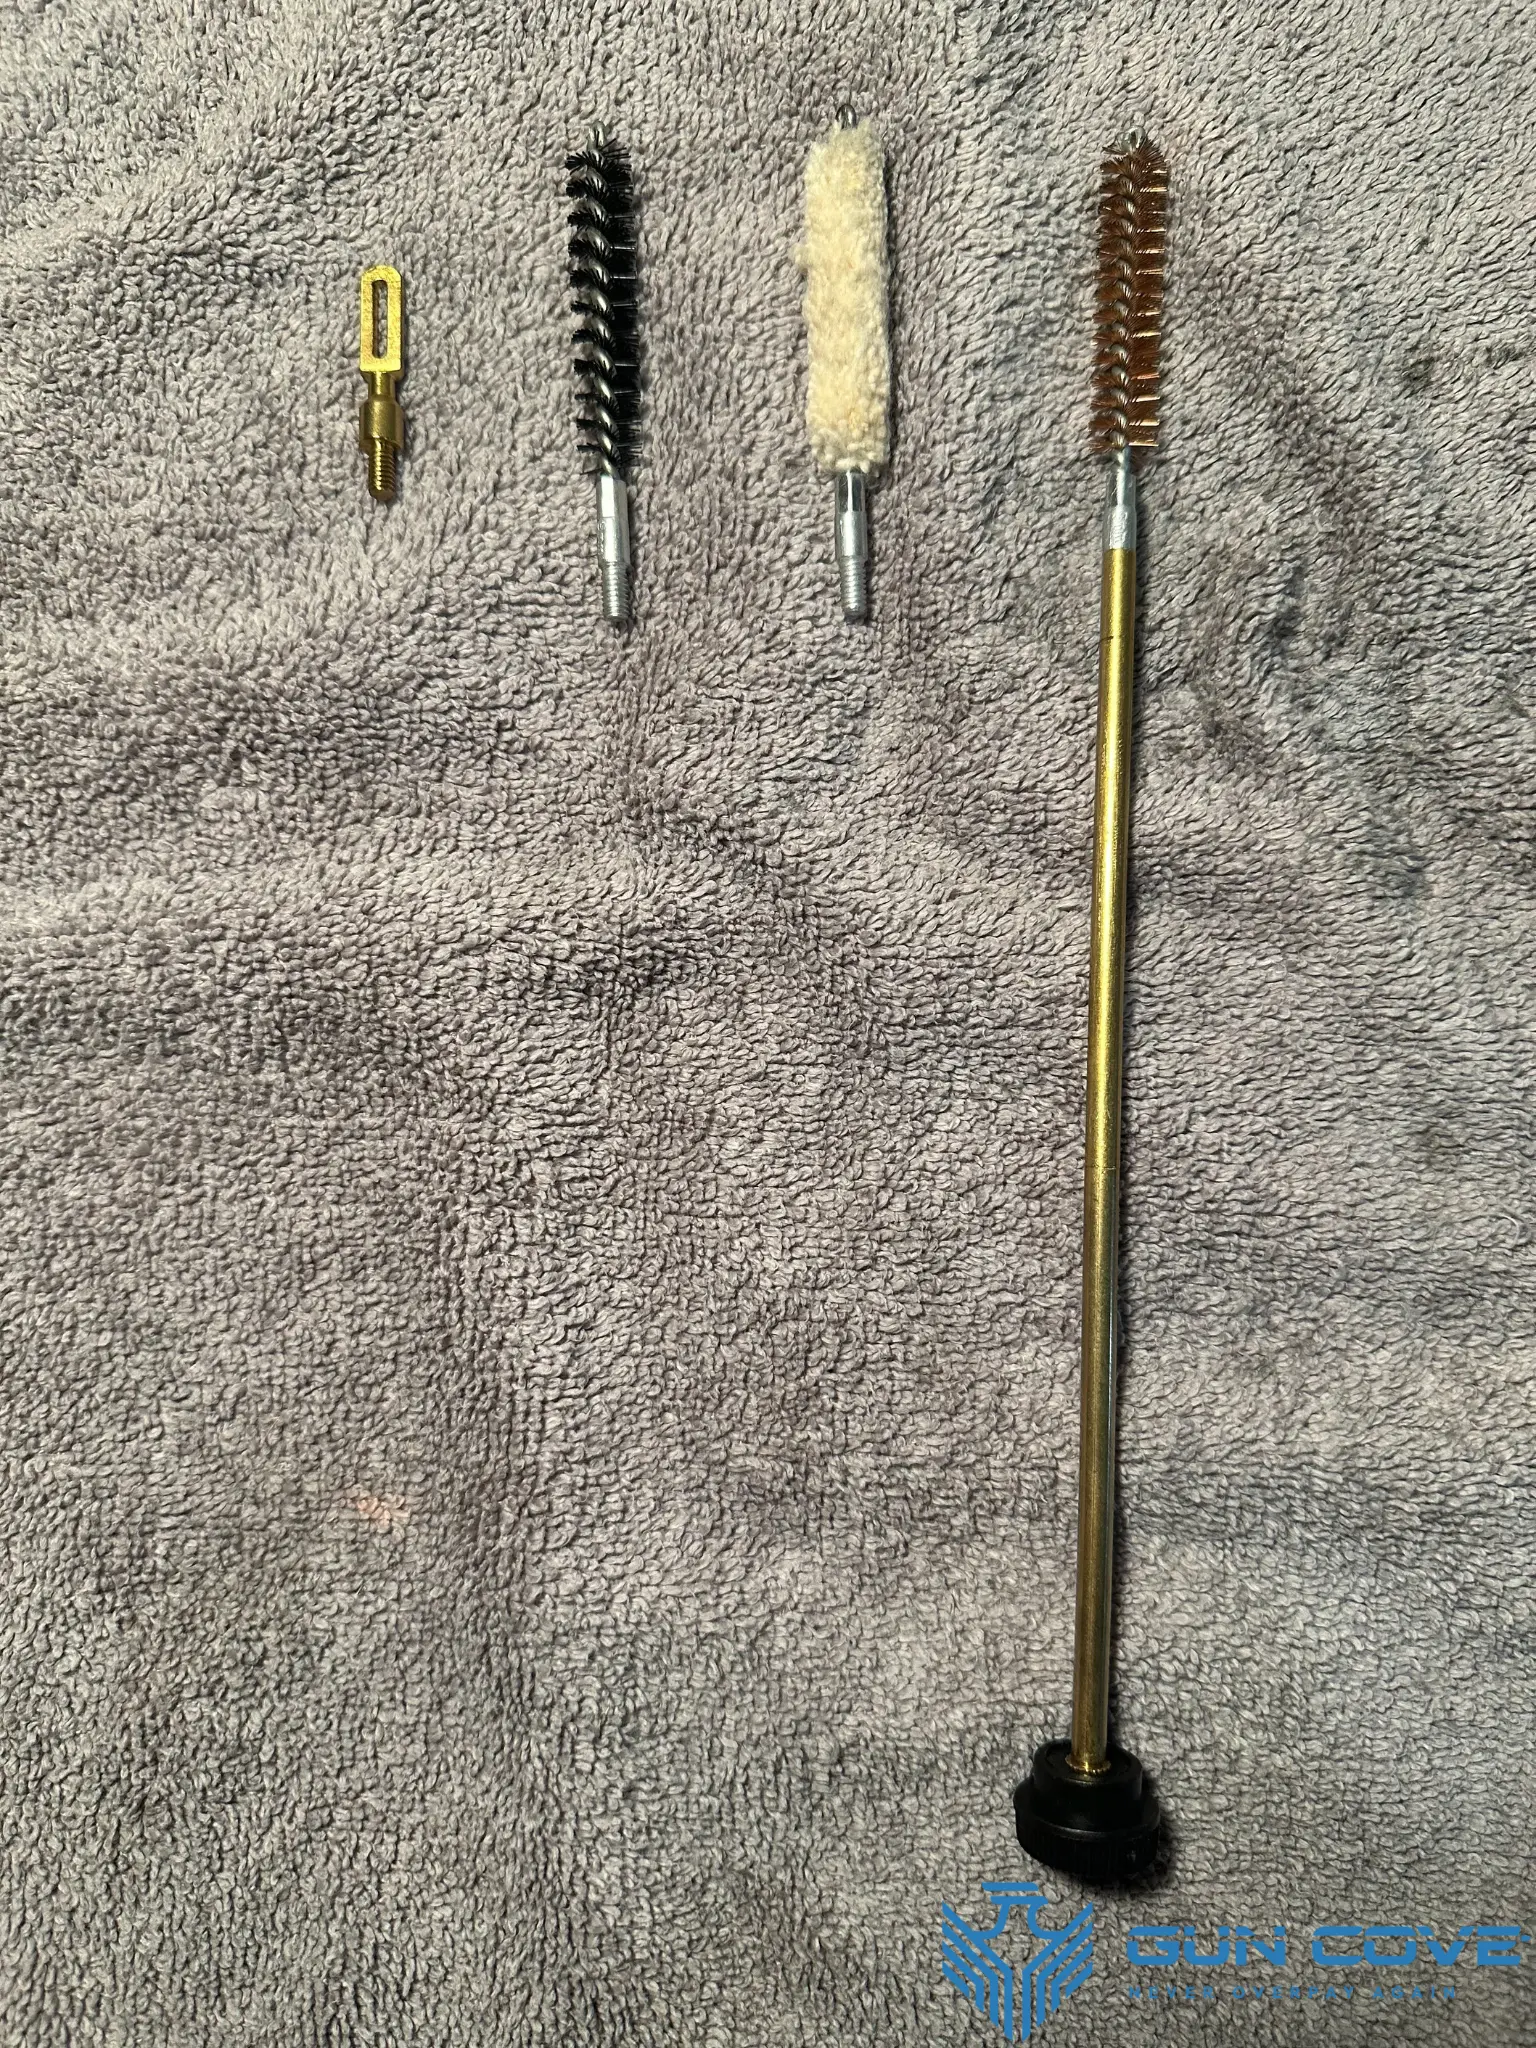
- 9mm bore brush
- Cleaning rod
- Cleaning patches
- Nylon brush (a toothbrush also works!)
- An old rag
- Q-tips
Some may enjoy adding in some quality-of-life items like disposable gloves and a rubber mat to protect whatever surface you're cleaning your pistol on. Other products like a bore snake can provide an extra level of finish that you would struggle to achieve without it.
Step 1: Safely Clear the Chamber
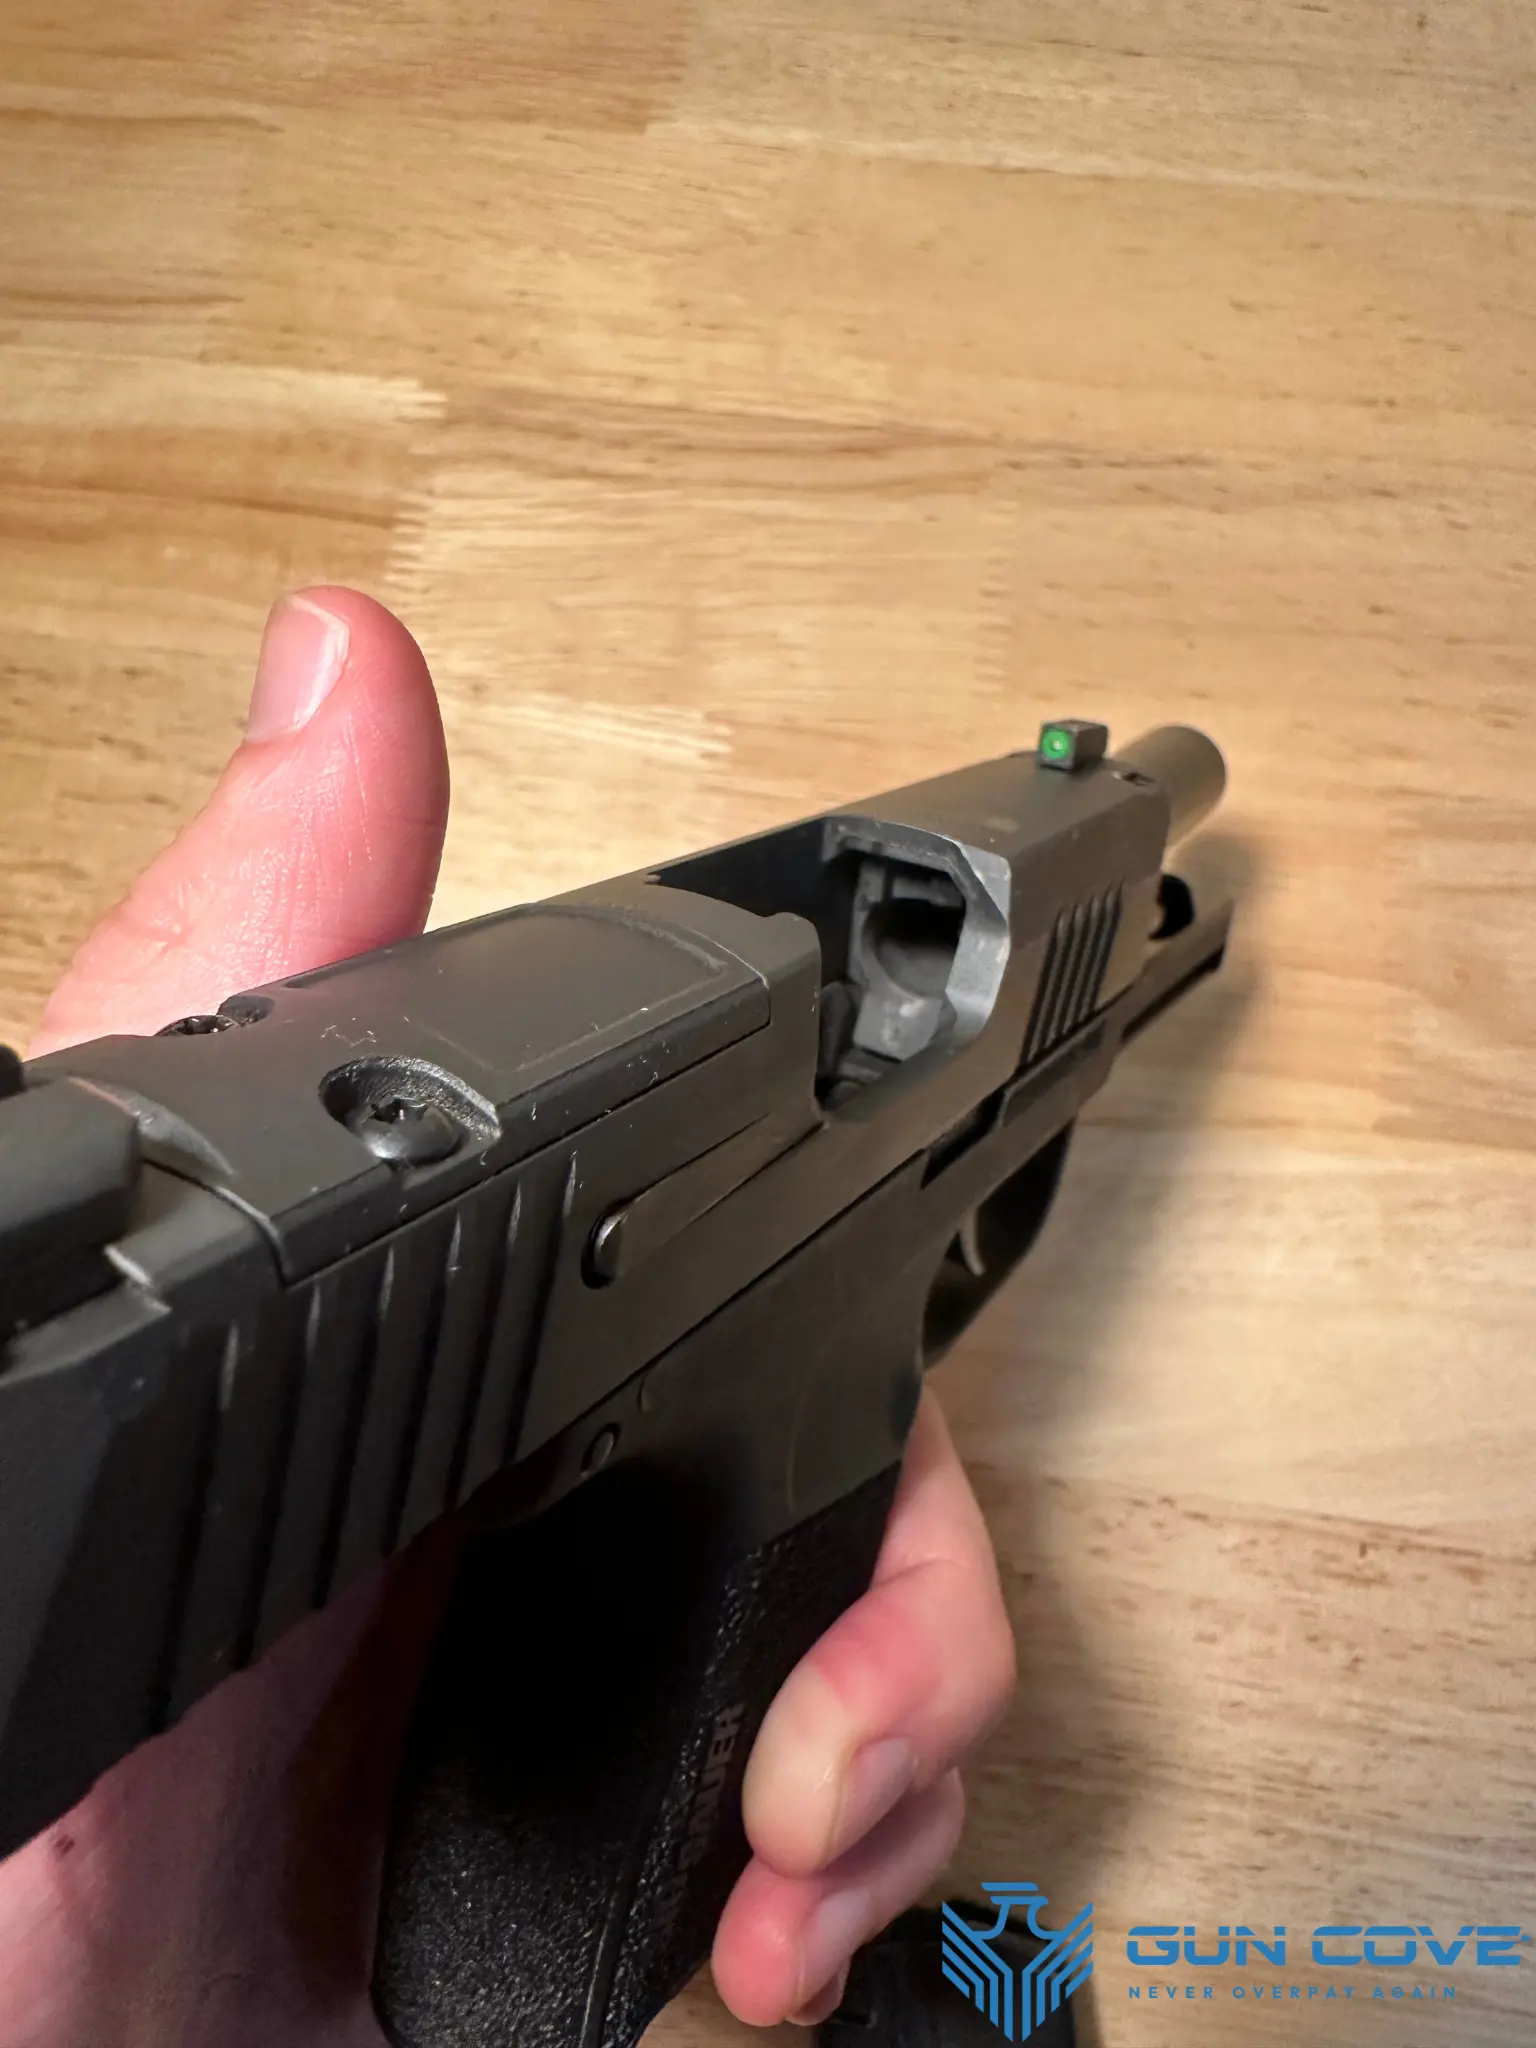
You know the rules of firearms safety. Point your P365 in a safe direction and keep your finger off the trigger. Drop the magazine and rack the slide a couple of times - at this point any rounds that may have been in the chamber should be cleared.
Now, rack the slide again but this time use the slide catch to keep it held back. Perform a visual check and maybe stick a booger hook in the chamber to perform a physical inspection as well.
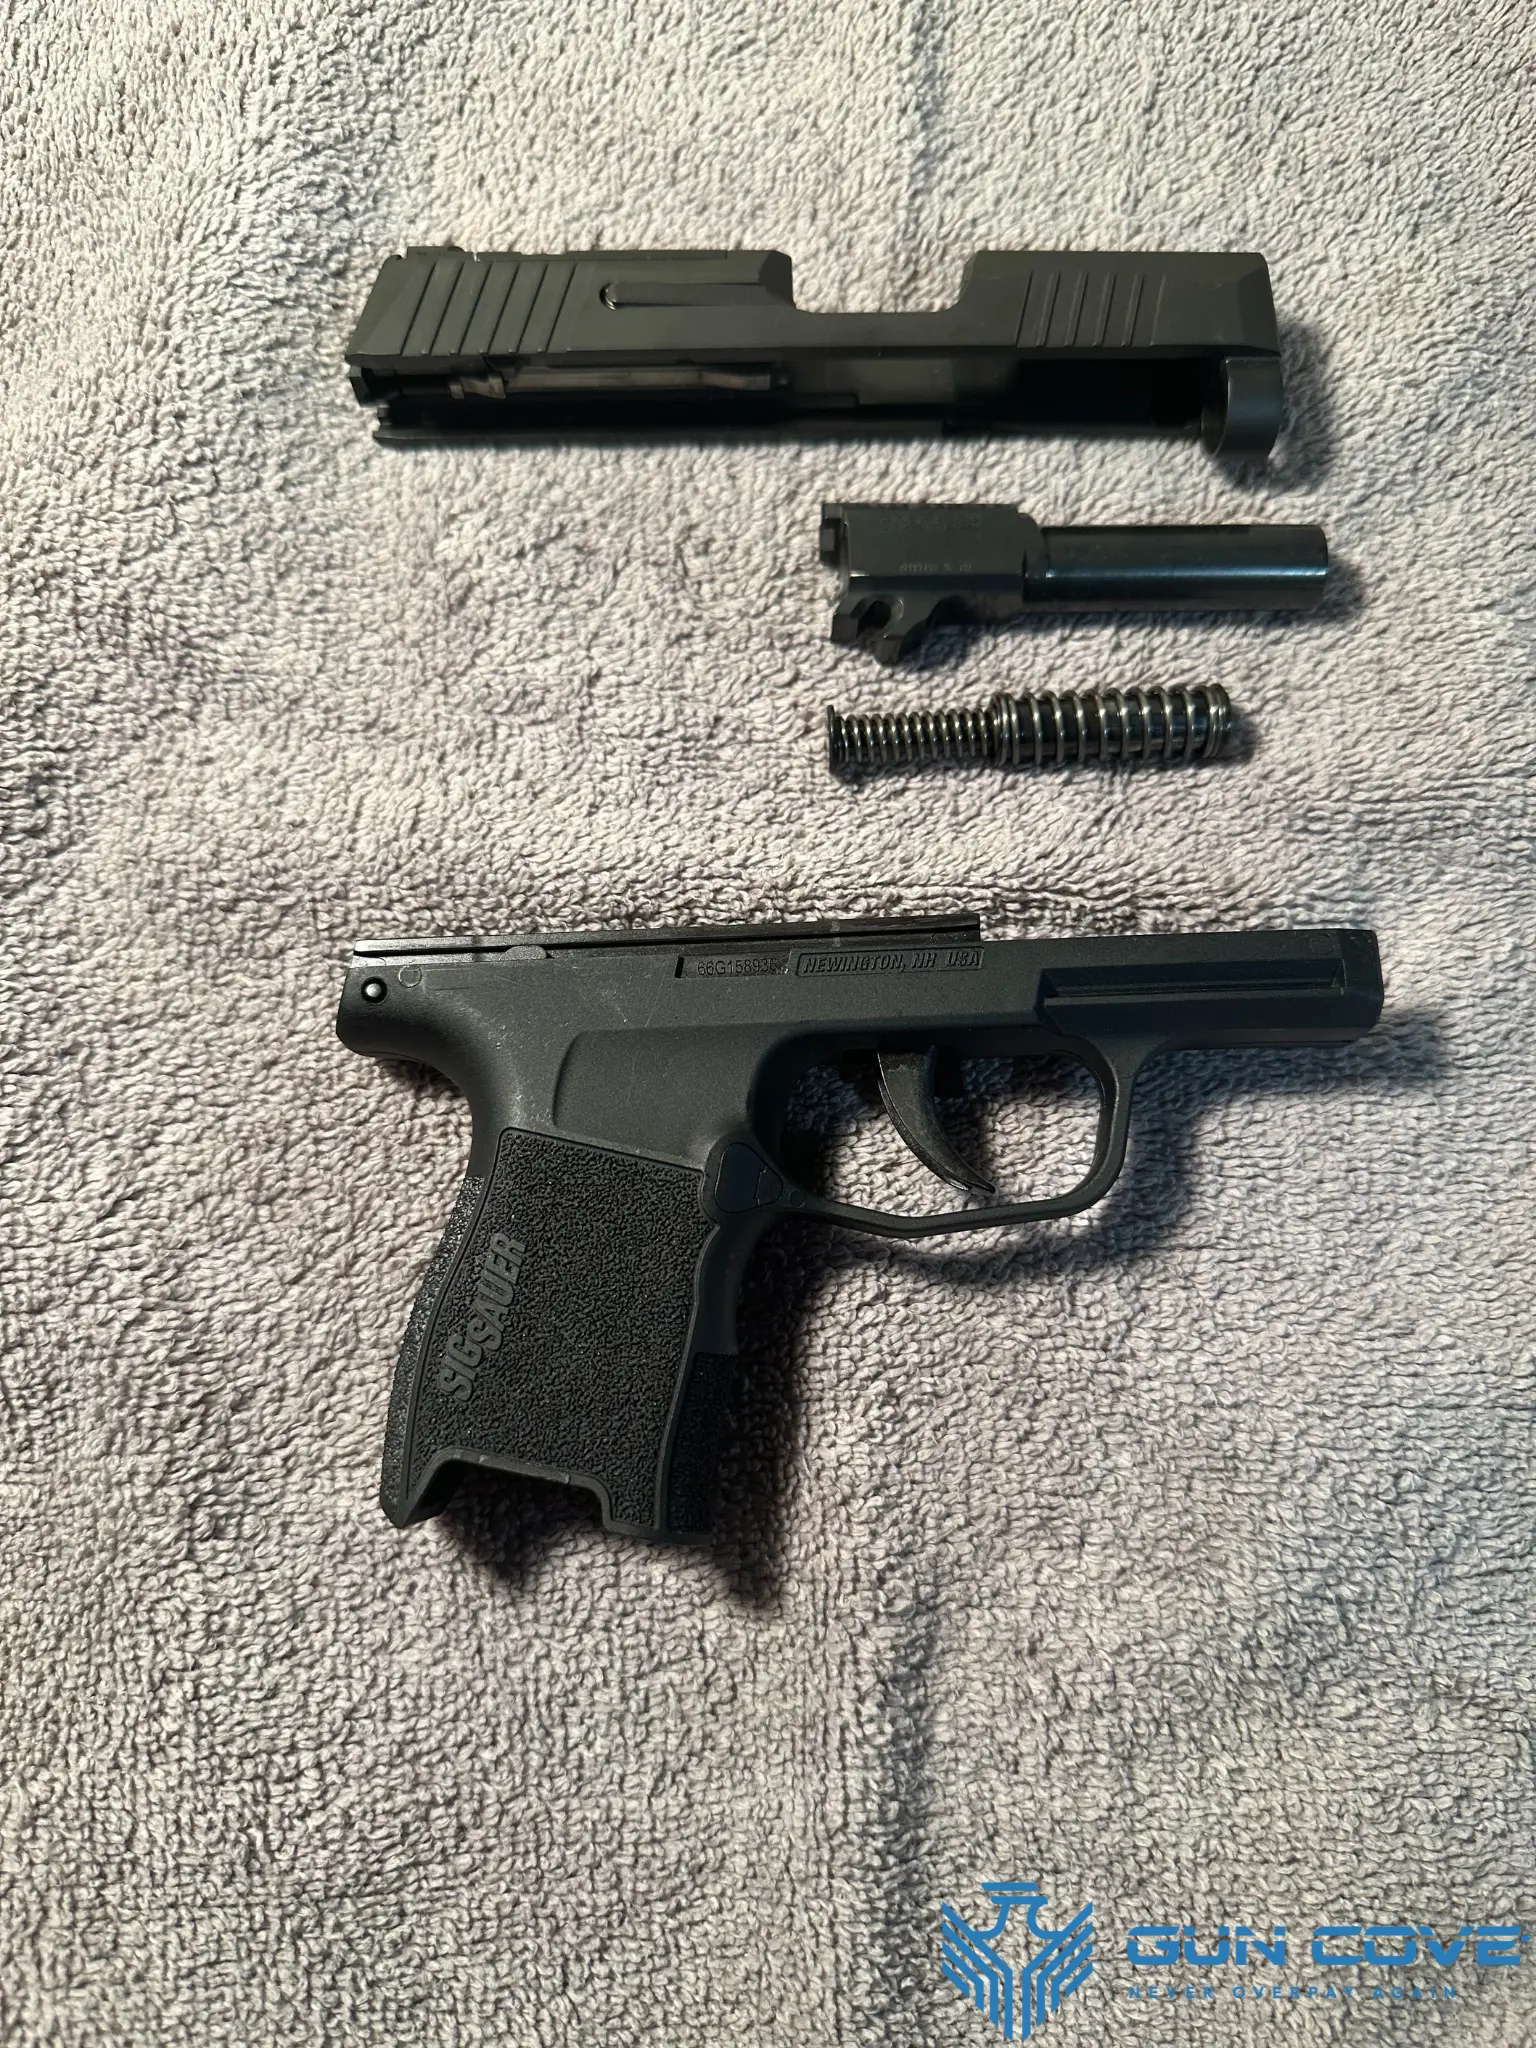
Step 2: Disassemble Your Firearm
Remove the slide
The first step to field stripping your P365 is to remove your slide. With the slide locked back, you should push the takedown lever all the way until it's approximately 90 degrees from its starting position.
Once the lever is locked in place, use your off-hand to hold the slide while you use your other hand to activate the slide release. Slowly bring the slide forward and push the slide off the front of the frame.
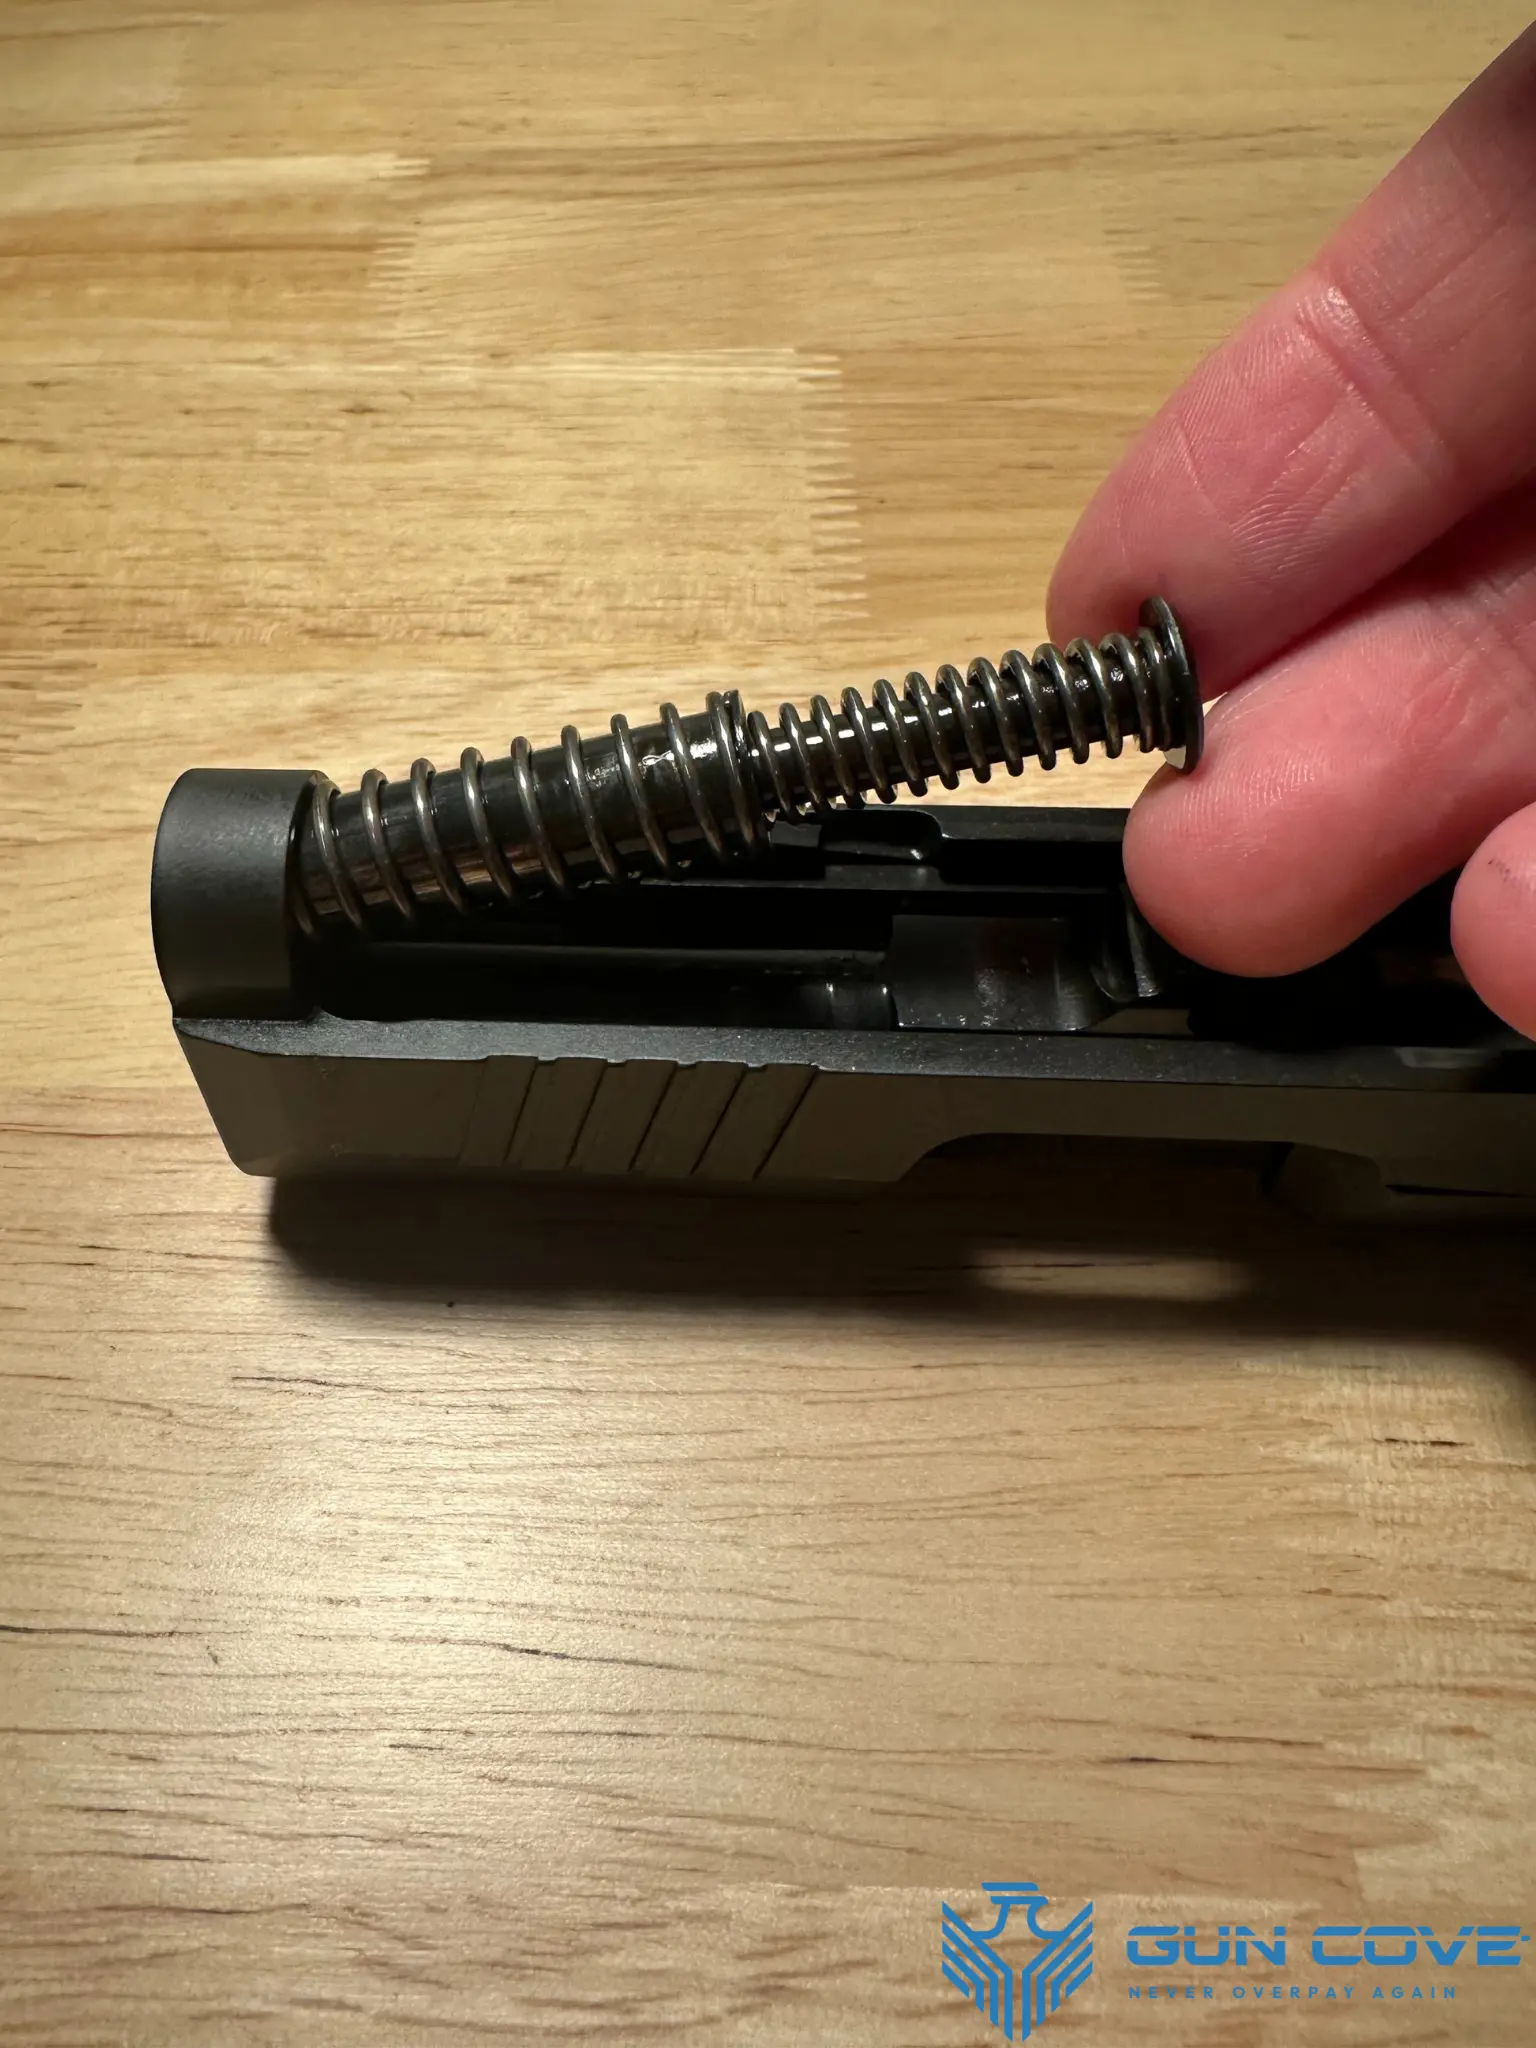
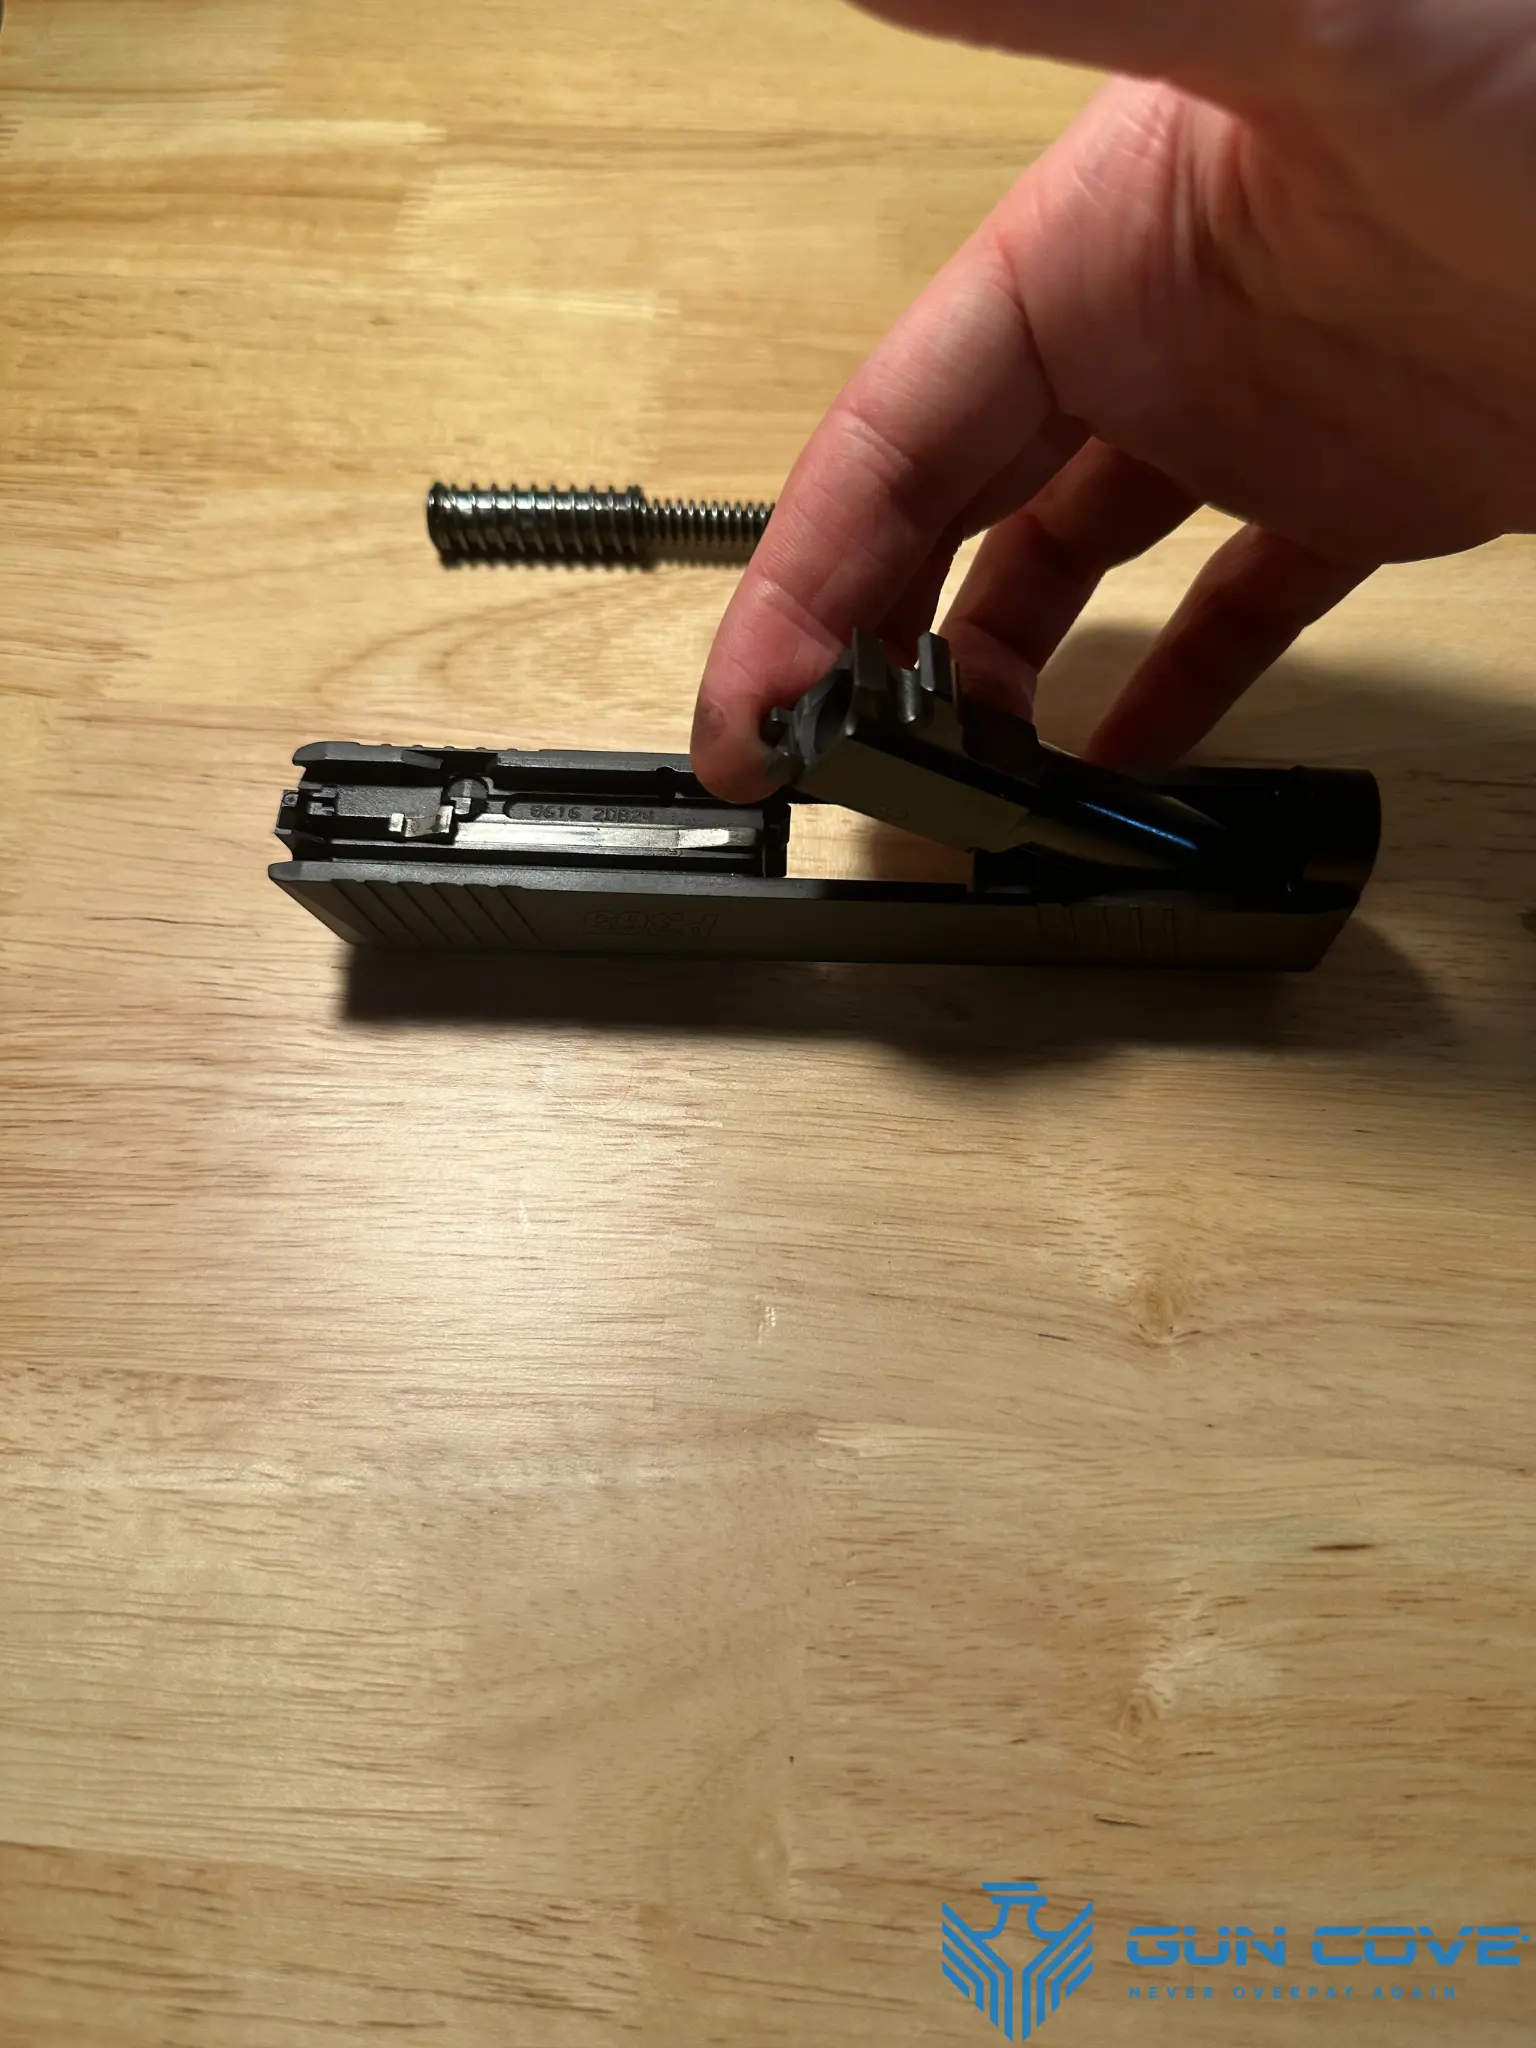
Remove the recoil spring and guide rod
This step is simple. Push on the guide rod from the chamber side and pivot the guide rod out to remove it from the slide.
Remove the barrel
Finally, remove the barrel of your P365 by pushing the chamber side of the barrel slightly forward before pivoting the barrel and pulling it out (again, chamber side first).
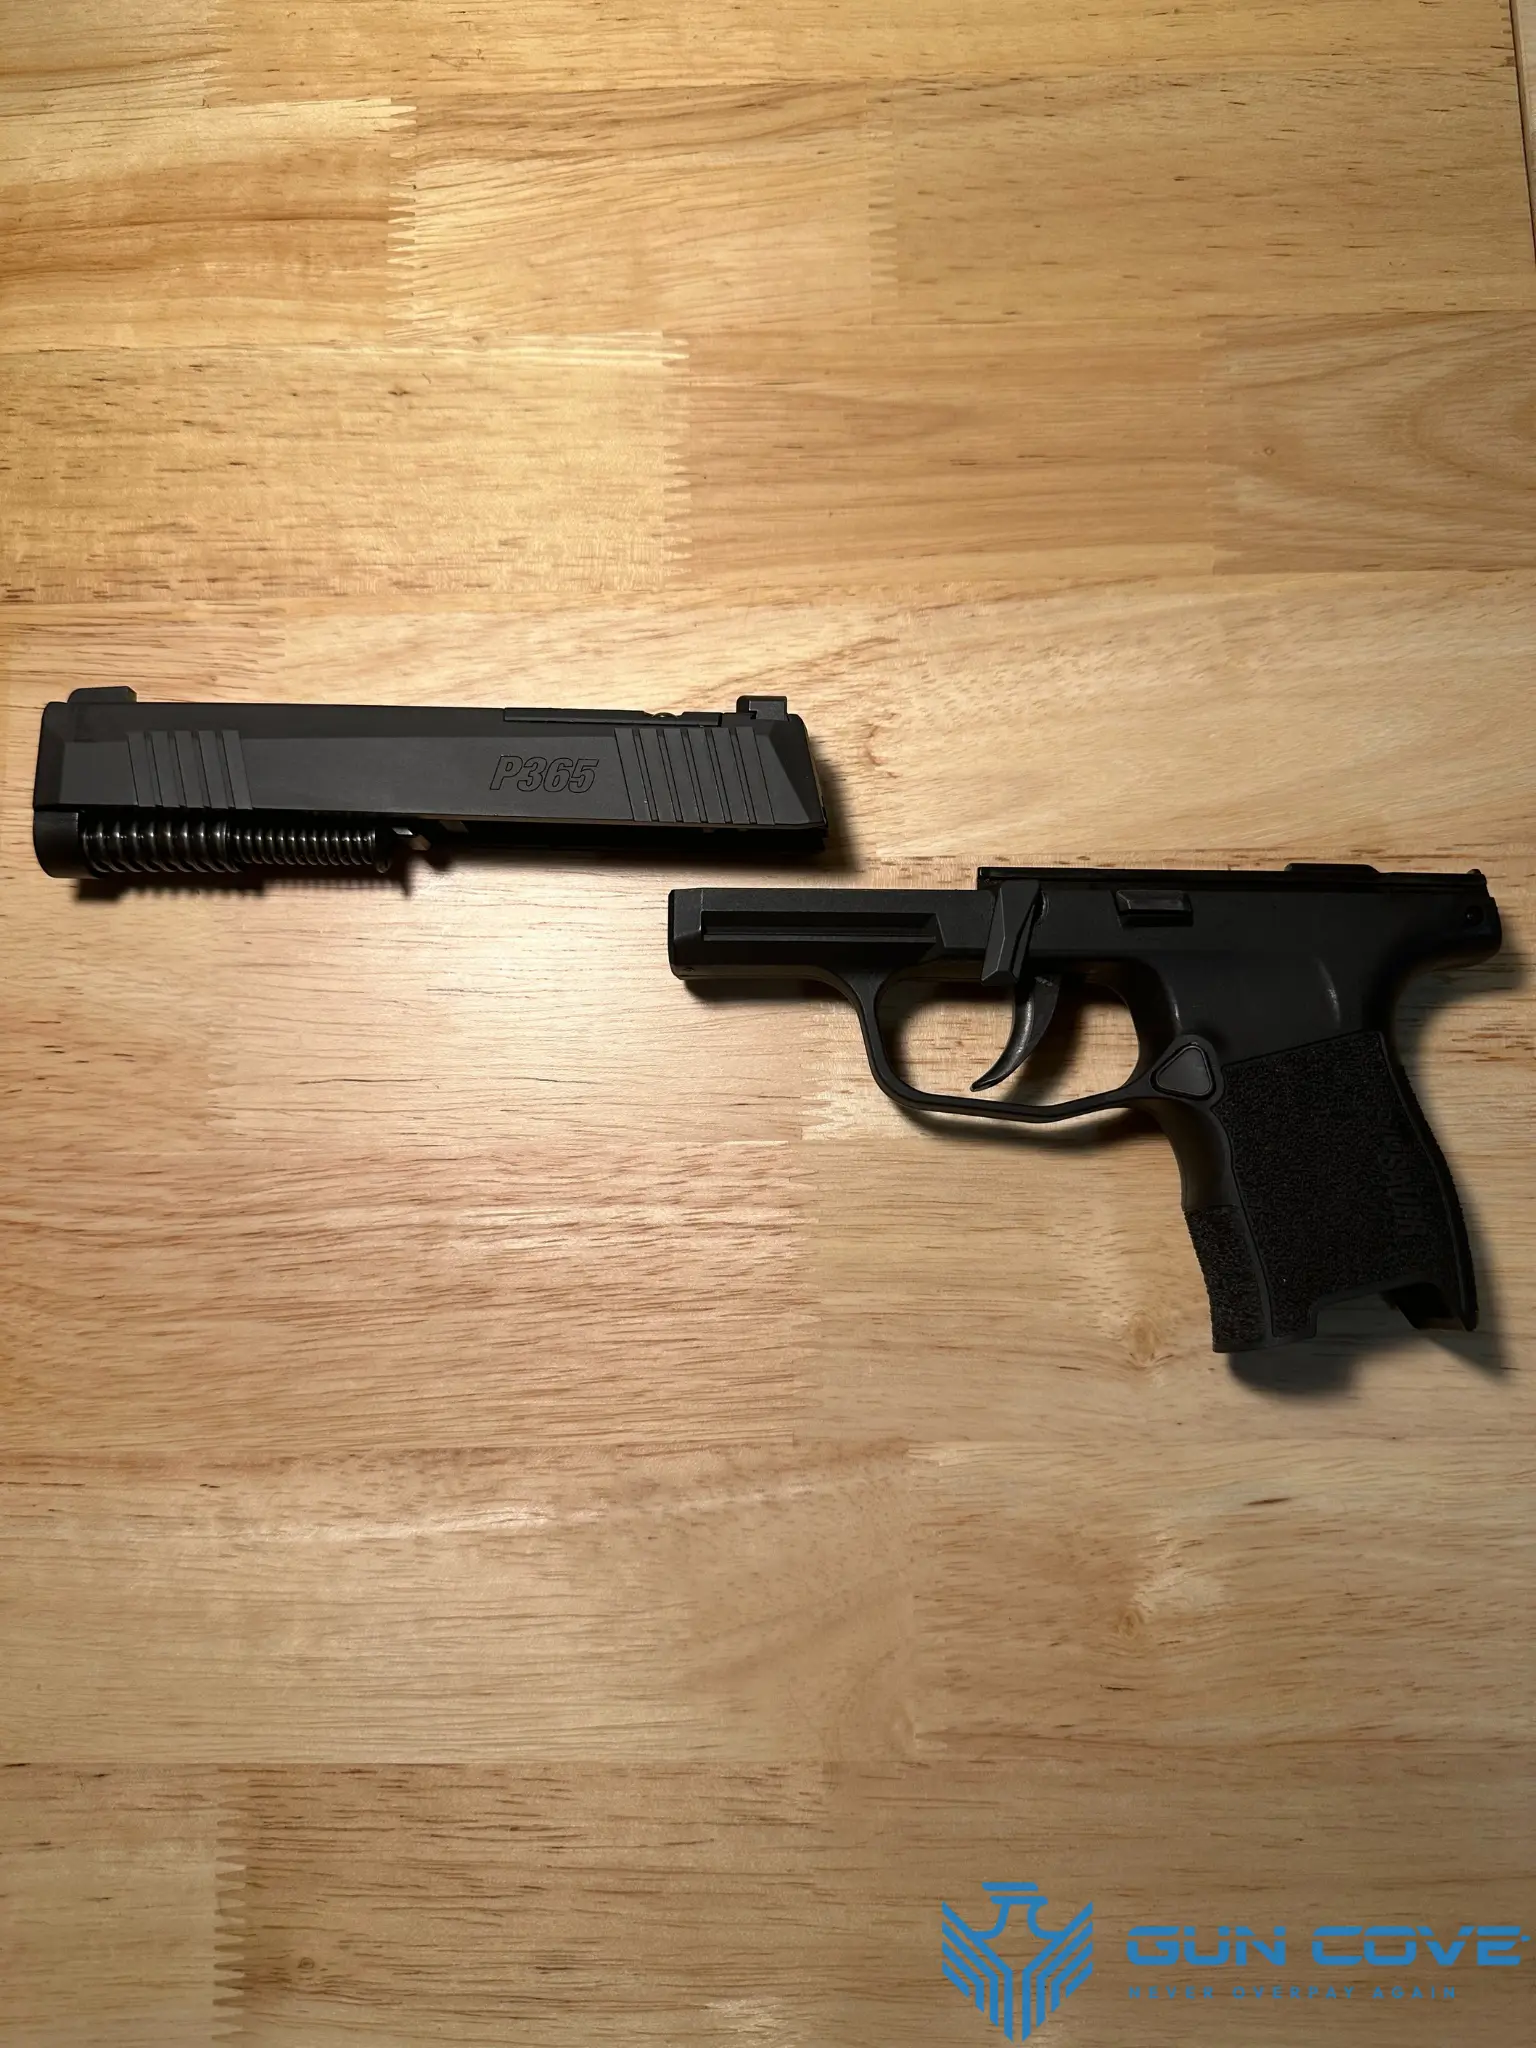
Congratulations, you just finished field stripping your P365.
Step 3: Clean the Slide Assembly
The first step in cleaning your slide assembly is to remove all the old lubricant. To do this, scrub down the slide assembly with your brush and give it a wipe down with your cloth.
With the old lubricant off, we'll now want to apply our CLP. CLP stands for "Clean", "Lubricate", and "Protect" and is a general purpose gun cleaning product. There are other options available, but CLP is ubiquitous and the solution you're most likely to encounter.
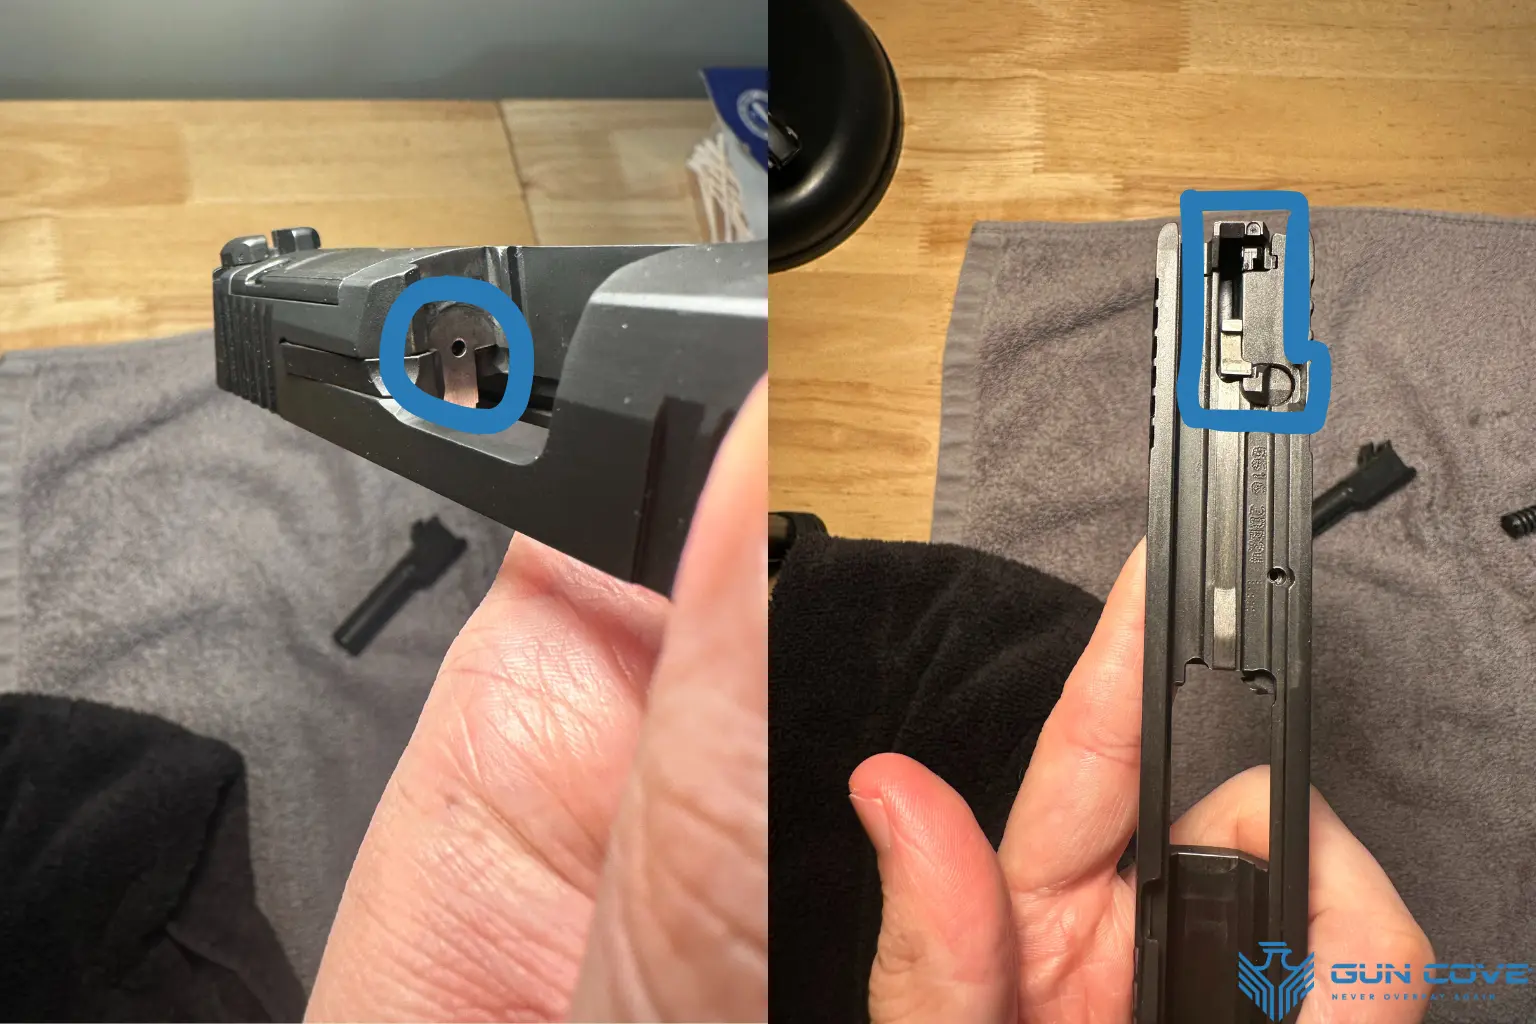
Take special care that you DO NOT spray your cleaning solution into the striker channel (or onto the breech face, which leads to the striker channel). Allowing lubricant to flow into your striker channel can result in failures to fire due to light strikes of the primer. I like to orient the slide muzzle-down while cleaning to avoid any chance of CLP flowing back through the hole in the breech face.
Now that you've applied CLP to your slide, go ahead and give it a thorough scrubbing with your nylon brush. Though you should not spray directly onto your breech face, it is important to thoroughly clean that area and remove any carbon buildup or dirt that may have accumulated there. Focus also on the rail slots, extractor, and any other parts that show signs of metal-on-metal wear.
For the area around your striker channel, it is wise to simply use a q-tip. This not only avoids introducing cleaner into the channel, but it also helps to soak up and remove any liquid that may have found its way into the cavity already.
Once everything's been brushed down and cleaned, take your rag and wipe off any excess CLP, while taking care to leave your metal-to-metal interfaces (like your slide rails) lubricated. Once again, Q-tips may be helpful here for tighter areas.
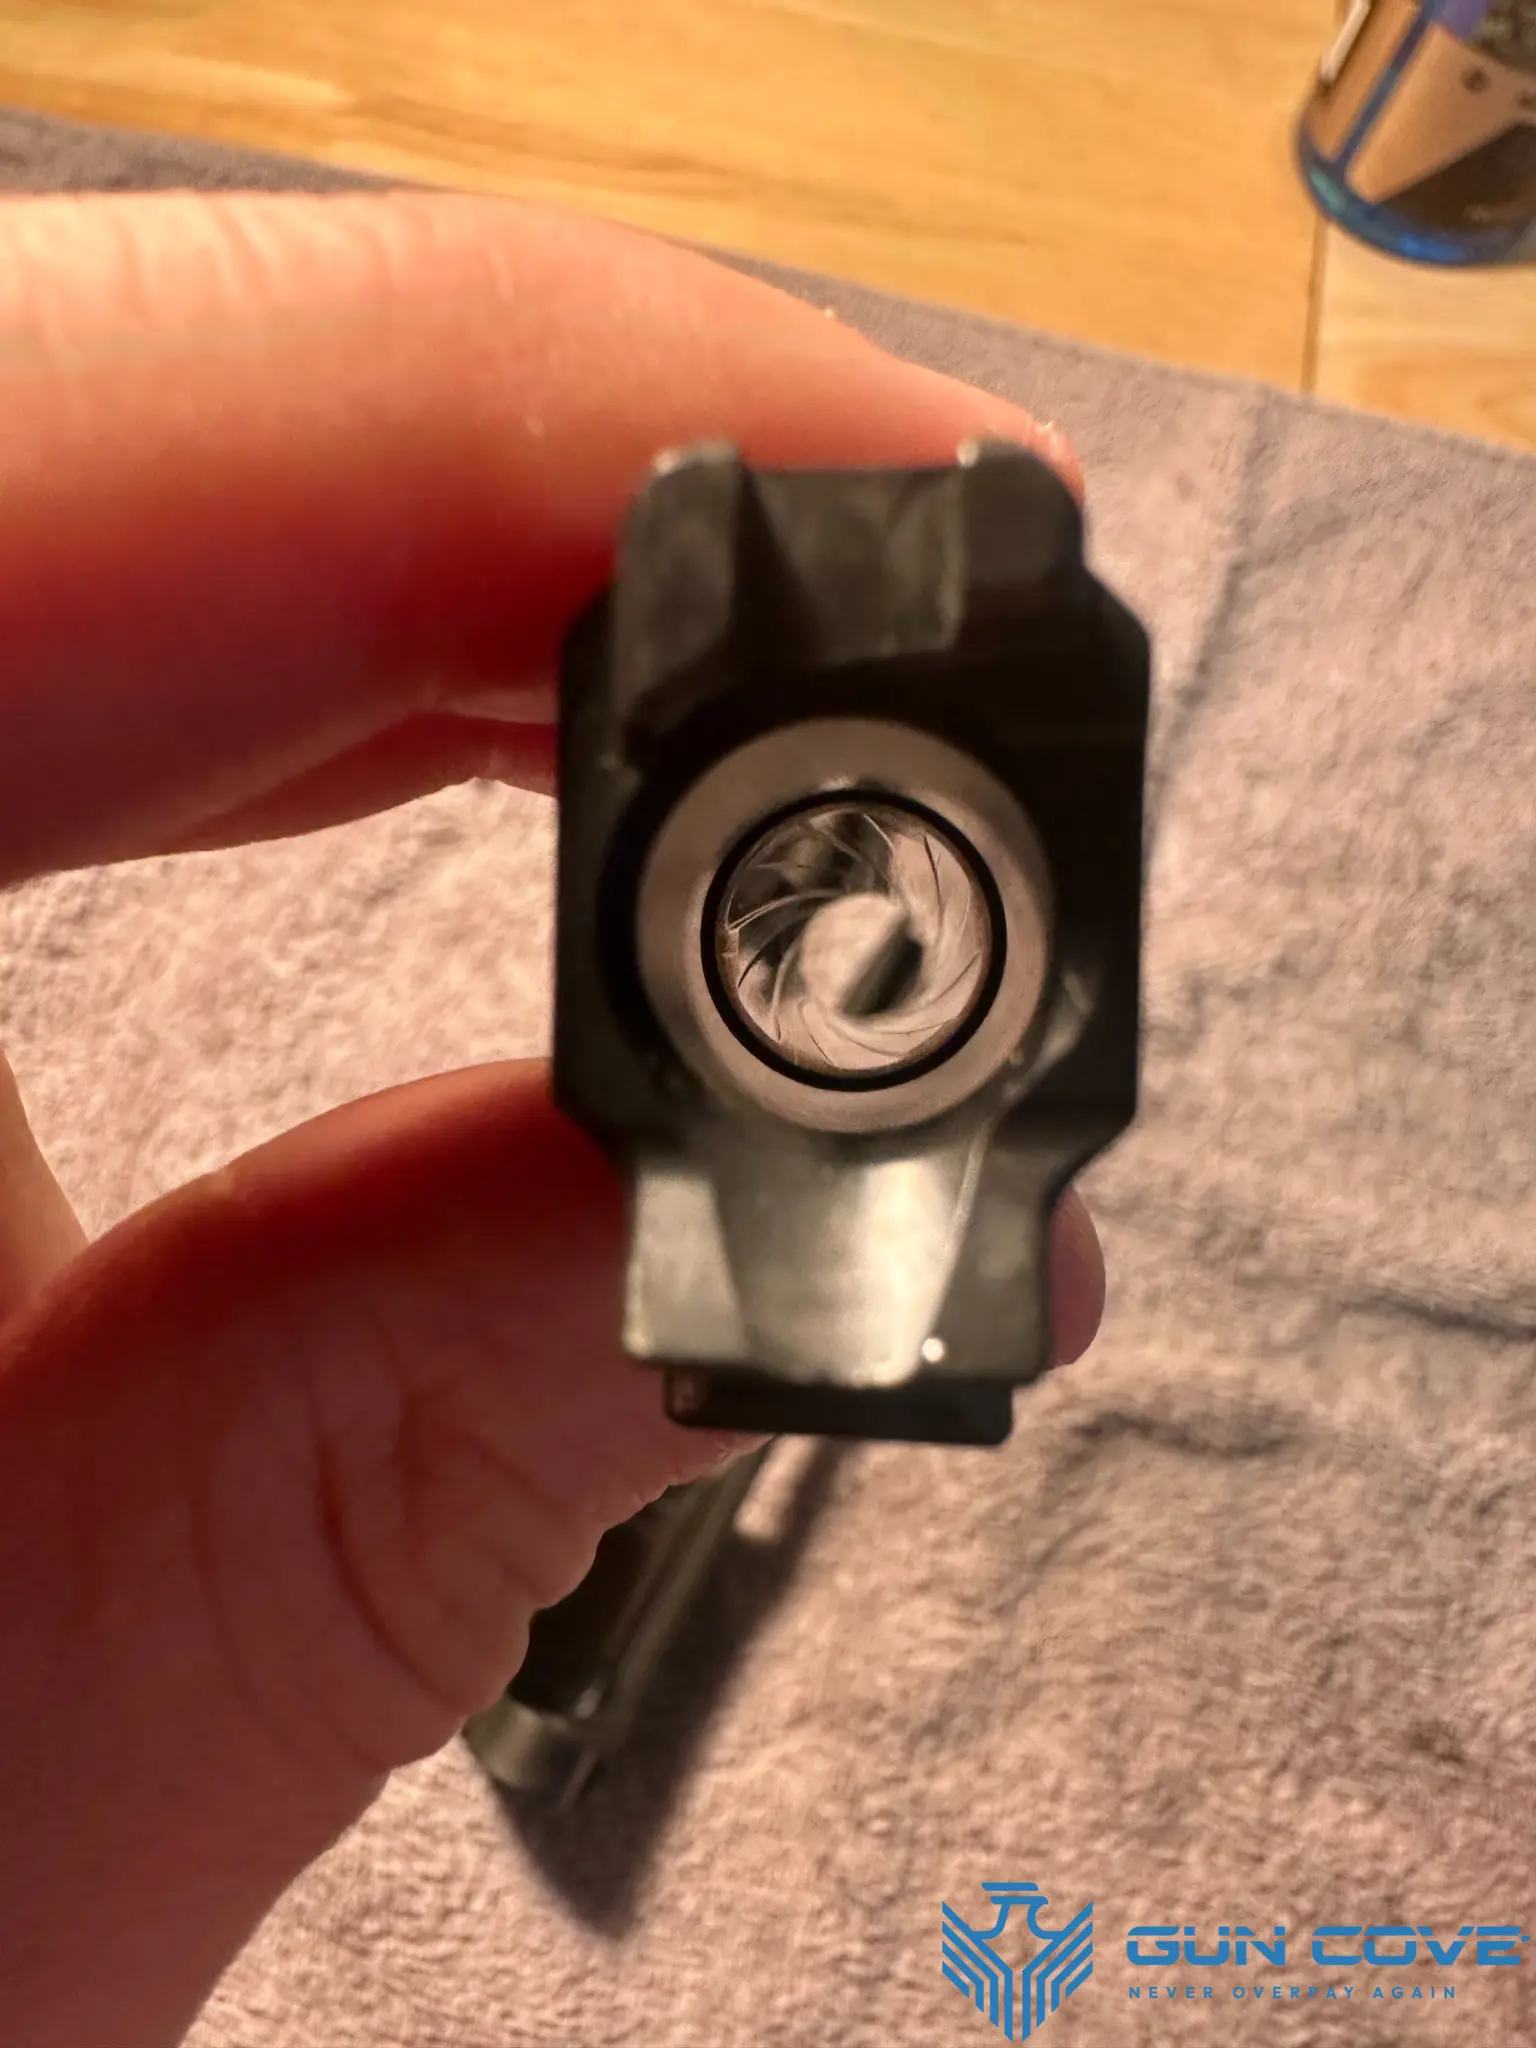
Step 4: Clean the Barrel
Moving onto the barrel, we'll immediately get to spraying it down with our CLP and giving it a moment to soak in and loosen the carbon. At this point, you can also spray all your remaining components so you can begin letting the CLP soak in on those parts as well.
Be sure to get CLP in the bore of the barrel. Luckily for us, there are no sensitive areas we have to worry about here. Scrub it down with your nylon brush until the majority of the carbon buildup has been removed.
Once content, you will want to begin to clean the bore of the barrel. Grab your guide rod and screw a 9mm-sized bore brush onto the end. Use the handle to pass the bore brush through your barrel, which allows it to spin freely. You should be going in a single direction each time (usually chamber-to-muzzle) before unscrewing the brush and removing the rod from the bore. Then, reattach your brush and pass it through another time. You want to avoid going back and forth in the barrel as this runs the risk of not actually evacuating all the carbon buildup from the barrel.
After finishing with the brush, you should move onto passing patches through the barrel in the same, one-directional manner that you passed the brush through before. Spray CLP on the patch before passing it through the barrel. Repeat this process until the patches begin to come out the other end about as clean as they started.

Some people like to finish off their barrel cleaning process with a bore snake. This is completely optional, but it allows for an extra level of care that you'd struggle to achieve otherwise. If you buy one, just make sure it's sized for either 9mm or .38 caliber, otherwise it will not work in your P365.
Once cleaned, apply a light coat of CLP on the exterior of your barrel. Ensure you put a little CLP in the locking lugs as they tend to see lots of metal-to-metal contact.
Step 5: Clean the Recoil Spring Assembly
If your recoil spring assembly isn't already soaked in CLP, go ahead and spray it down. After letting the CLP soak for a minute or two, start scrubbing with your nylon brush. Typically, these brushes are double-sided, with a smaller end to help you get into tighter spaces like on the spring assembly. If you're using a toothbrush instead of a purpose-built nylon brush you'll probably find q-tips to be useful here.
Once cleaned, you will want to keep a light coat of CLP on the recoil assembly of your P365.
Step 6: Clean the Frame Assembly
With your frame assembly soaked in CLP, begin gently scrubbing with one of your cotton cloths. Following this, apply some CLP to your nylon brush and begin to scrub down any of the "functional" (i.e. moving) parts. The critical areas to clean on your Sig P365's frame assembly are the frame rails, the takedown lever, and the slide catch lever.
With your frame cleaned, you'll now want to lubricate your rails (if you didn't already lubricate your rail slots on the slide).
Step 7: Reassemble
Reassembling the Sig Sauer P365 is relatively simple. First, place the barrel into the chamber, ensuring the lugs are oriented downwards. Then, insert the recoil spring assembly, with the thicker end of the guide rod on the muzzle-end of the gun. Finally, pull the slide back onto the frame by lining up the rails and the rail slots and then bringing the slide all the way back until it's held open by the slide stop. Rotate the takedown lever back to its neutral position and voila - all done!

How Often Should I Clean?
According to Sig Sauer's user manual it's recommended to clean the P365 after every use. At a bare minimum, however, the gun should be cleaned after every 500 rounds.
Conclusion
By following these steps, you can keep your Sig Sauer P365 in peak condition. Regular cleaning ensures reliability, safety, and longevity. Happy shooting!